Securing self-hosted Plex with Cloudflare Tunnels
Update 2022-09-16: After publishing this post I’ve received a few comments saying it is against Cloudflare ToS to stream video using Cloudflare Tunnels.
2.8 Limitation on Serving Non-HTML Content The Services are offered primarily as a platform to cache and serve web pages and websites. Unless explicitly included as part of a Paid Service purchased by you, you agree to use the Services solely for the purpose of (i) serving web pages as viewed through a web browser or other functionally equivalent applications, including rendering Hypertext Markup Language (HTML) or other functional equivalents, and (ii) serving web APIs subject to the restrictions set forth in this Section 2.8. Use of the Services for serving video or a disproportionate percentage of pictures, audio files, or other non-HTML content is prohibited, unless purchased separately as part of a Paid Service or expressly allowed under our Supplemental Terms for a specific Service. If we determine you have breached this Section 2.8, we may immediately suspend or restrict your use of the Services, or limit End User access to certain of your resources through the Services. 1
I use a paid zone plan which is not subject to the same limitations as the free plans. Your mileage may vary. Plex was used an as example but this process applies for ANY self-hosted application you want to secure.
Introduction

Plex.tv Media Server is an application to organize and stream your own personal library of videos, audio and photos. Plex supports sharing your library with others on your local network. Plex even has the ability to share your catalog over the public Internet through a feature called Remote Access.
However, most people should be extremely cautious when deploying anything that is accessible over the public Internet. Bots and hackers are continuously scanning IP addresses and well known ports for any opportunity to exploit services using default usernames and password or take advantage of CVE’s on out-of-date services to install malware on your devices. 🦠
Many new services have popped up over that last couple years that aim to solve the problems around exposing services directly to the public Internet. Tailscale, ngrok and Cloudflare Tunnels just to mention a few of them.
In this post I will show you how you can harden your Plex server using Cloudflare Tunnels to ensure your server is safe from direct attacks, no matter where it is hosted. For me, that means the old MacBook Pro sitting on the network rack in my closet. Additionally, I will go into how you can secure it even further (to you only!) with Cloudflare Access.
How do tunnels work?
A tunnel works by installing a client on your server and configuring it to establish a secure connection to
the upstream proxy. In this case I am using cloudflared and the upstream connection is Cloudflare’s Edge Network. You
can then configure a route that is used to connect to your service, like https://plex.example.com.
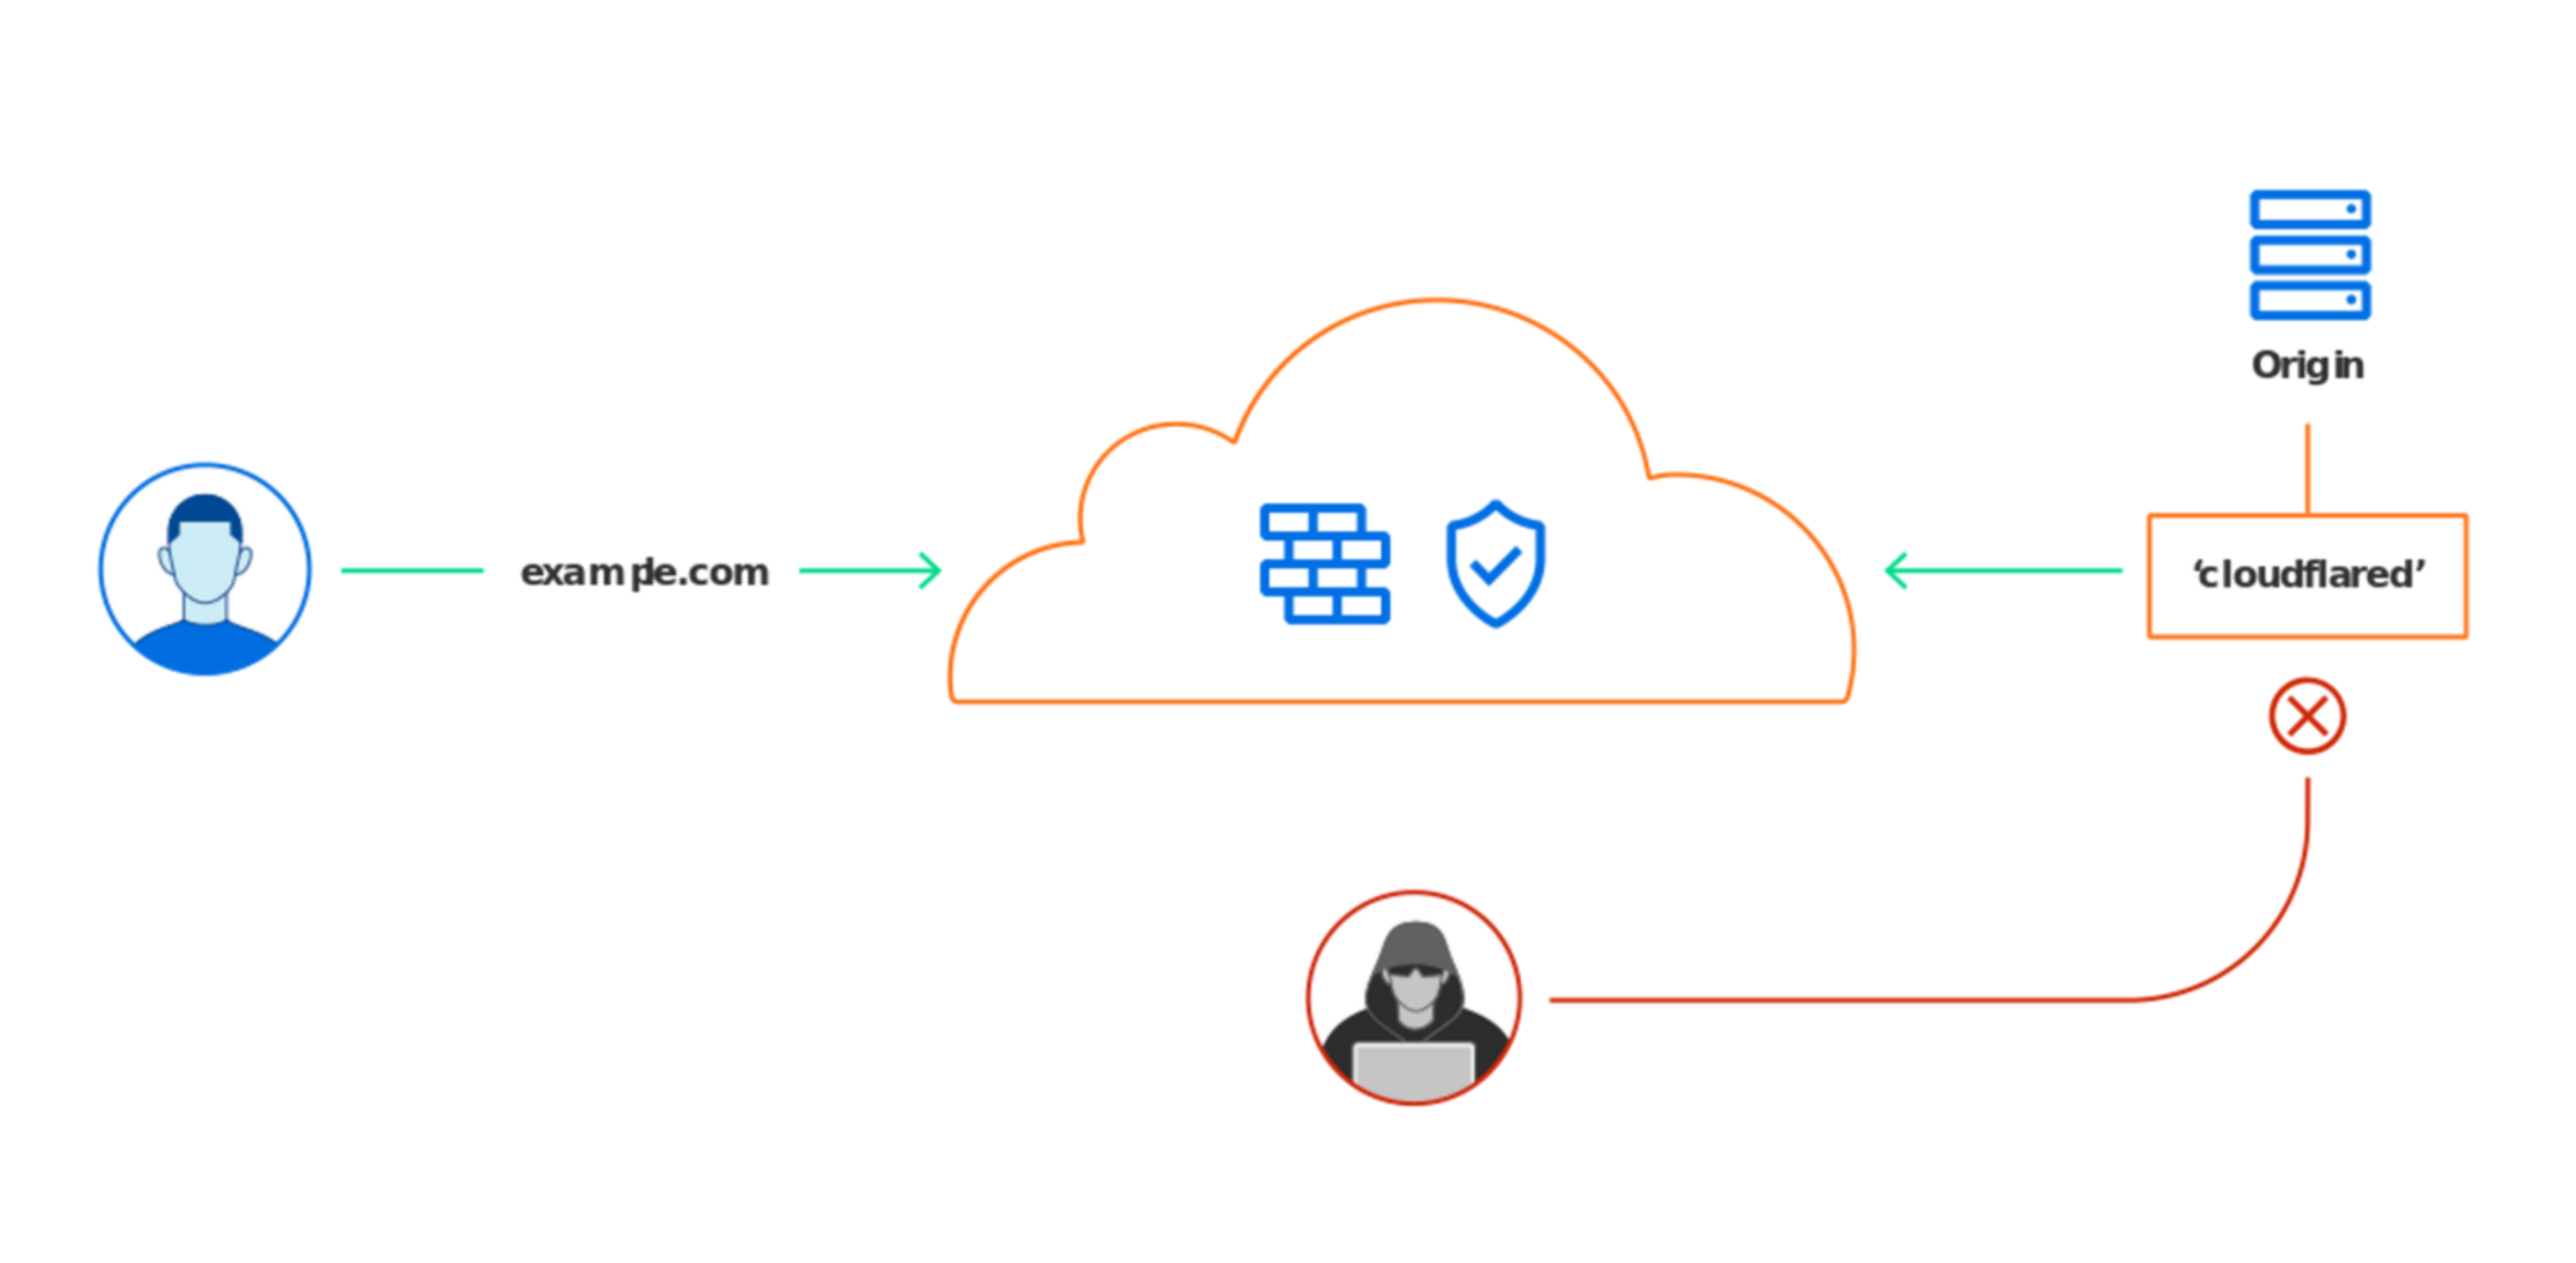
When a user navigates to https://plex.example.com, Cloudflare will proxy the client connection to the tunnel created
between your origin server and Cloudflare. Cloudflare will also filter out any malicious traffic from ever reaching your
origin server. While this is great for protecting your site from malicious traffic, anyone who knows the URL can still
access your site! Enter: Cloudflare Zero Trust.
Cloudflare Zero Trust
Again, while tunnels work great for getting your origin on the public Internet without poking any holes in your firewall or forwarding ports on your router, anyone with the address can still access your Plex login page. The next step is setting up a product called Cloudflare Access to prevent anyone but you from accessing your Plex. Everyone else will be simply met with a Cloudflare “access denied” page.

Step 1: Create a free Cloudflare Zero Trust account
If you don’t already have a Cloudflare account, head over to Cloudflare Zero Trust and create a free account. The free tier is more than generous and covers everything we will do in this post.
Step 2: Setting up the Tunnel
These instructions will be for macOS. Visit Cloudflare Developer Docs for specific instructions for your OS.
Installing cloudflared
# Install cloudflared
brew install cloudflare/cloudflare/cloudflared
cloudflared tunnel login # this will open a browser for you to log in.
Configure cloudflared
# Ensure the config directory exists
mkdir -p ~/.cloudflared

# Create  a new tunnel. Be sure to save the output of this
# command as it contains the Tunnel UUID needed in the next steps.
cloudflared tunnel create plex

TUNNEL_UUID=<tunnelUUID>
cat << EOF >~/.cloudflared/config.yaml
tunnel: ${TUNNEL_UUID}
credentials-file: /Users/${USER}/.cloudflared/${TUNNEL_UUID}.json

ingress:
  - hostname: plex.example.com
    service: http://localhost:32400
  - service: http_status:404
EOF

# Install the service to run at login
cloudflared service install
Create a route for your tunnel
This will attach your tunnel to your provided hostname.
cloudflared tunnel route plex plex.example.com
Go ahead and visit it to make sure it works!
Step 3: Create a Cloudflare Access Application
Finally, to ensure only you can access your Plex origin server, create an Application from the Zero Trust Dash.
On the left hand navigation, Access > Applications and choose “Add an Application”.
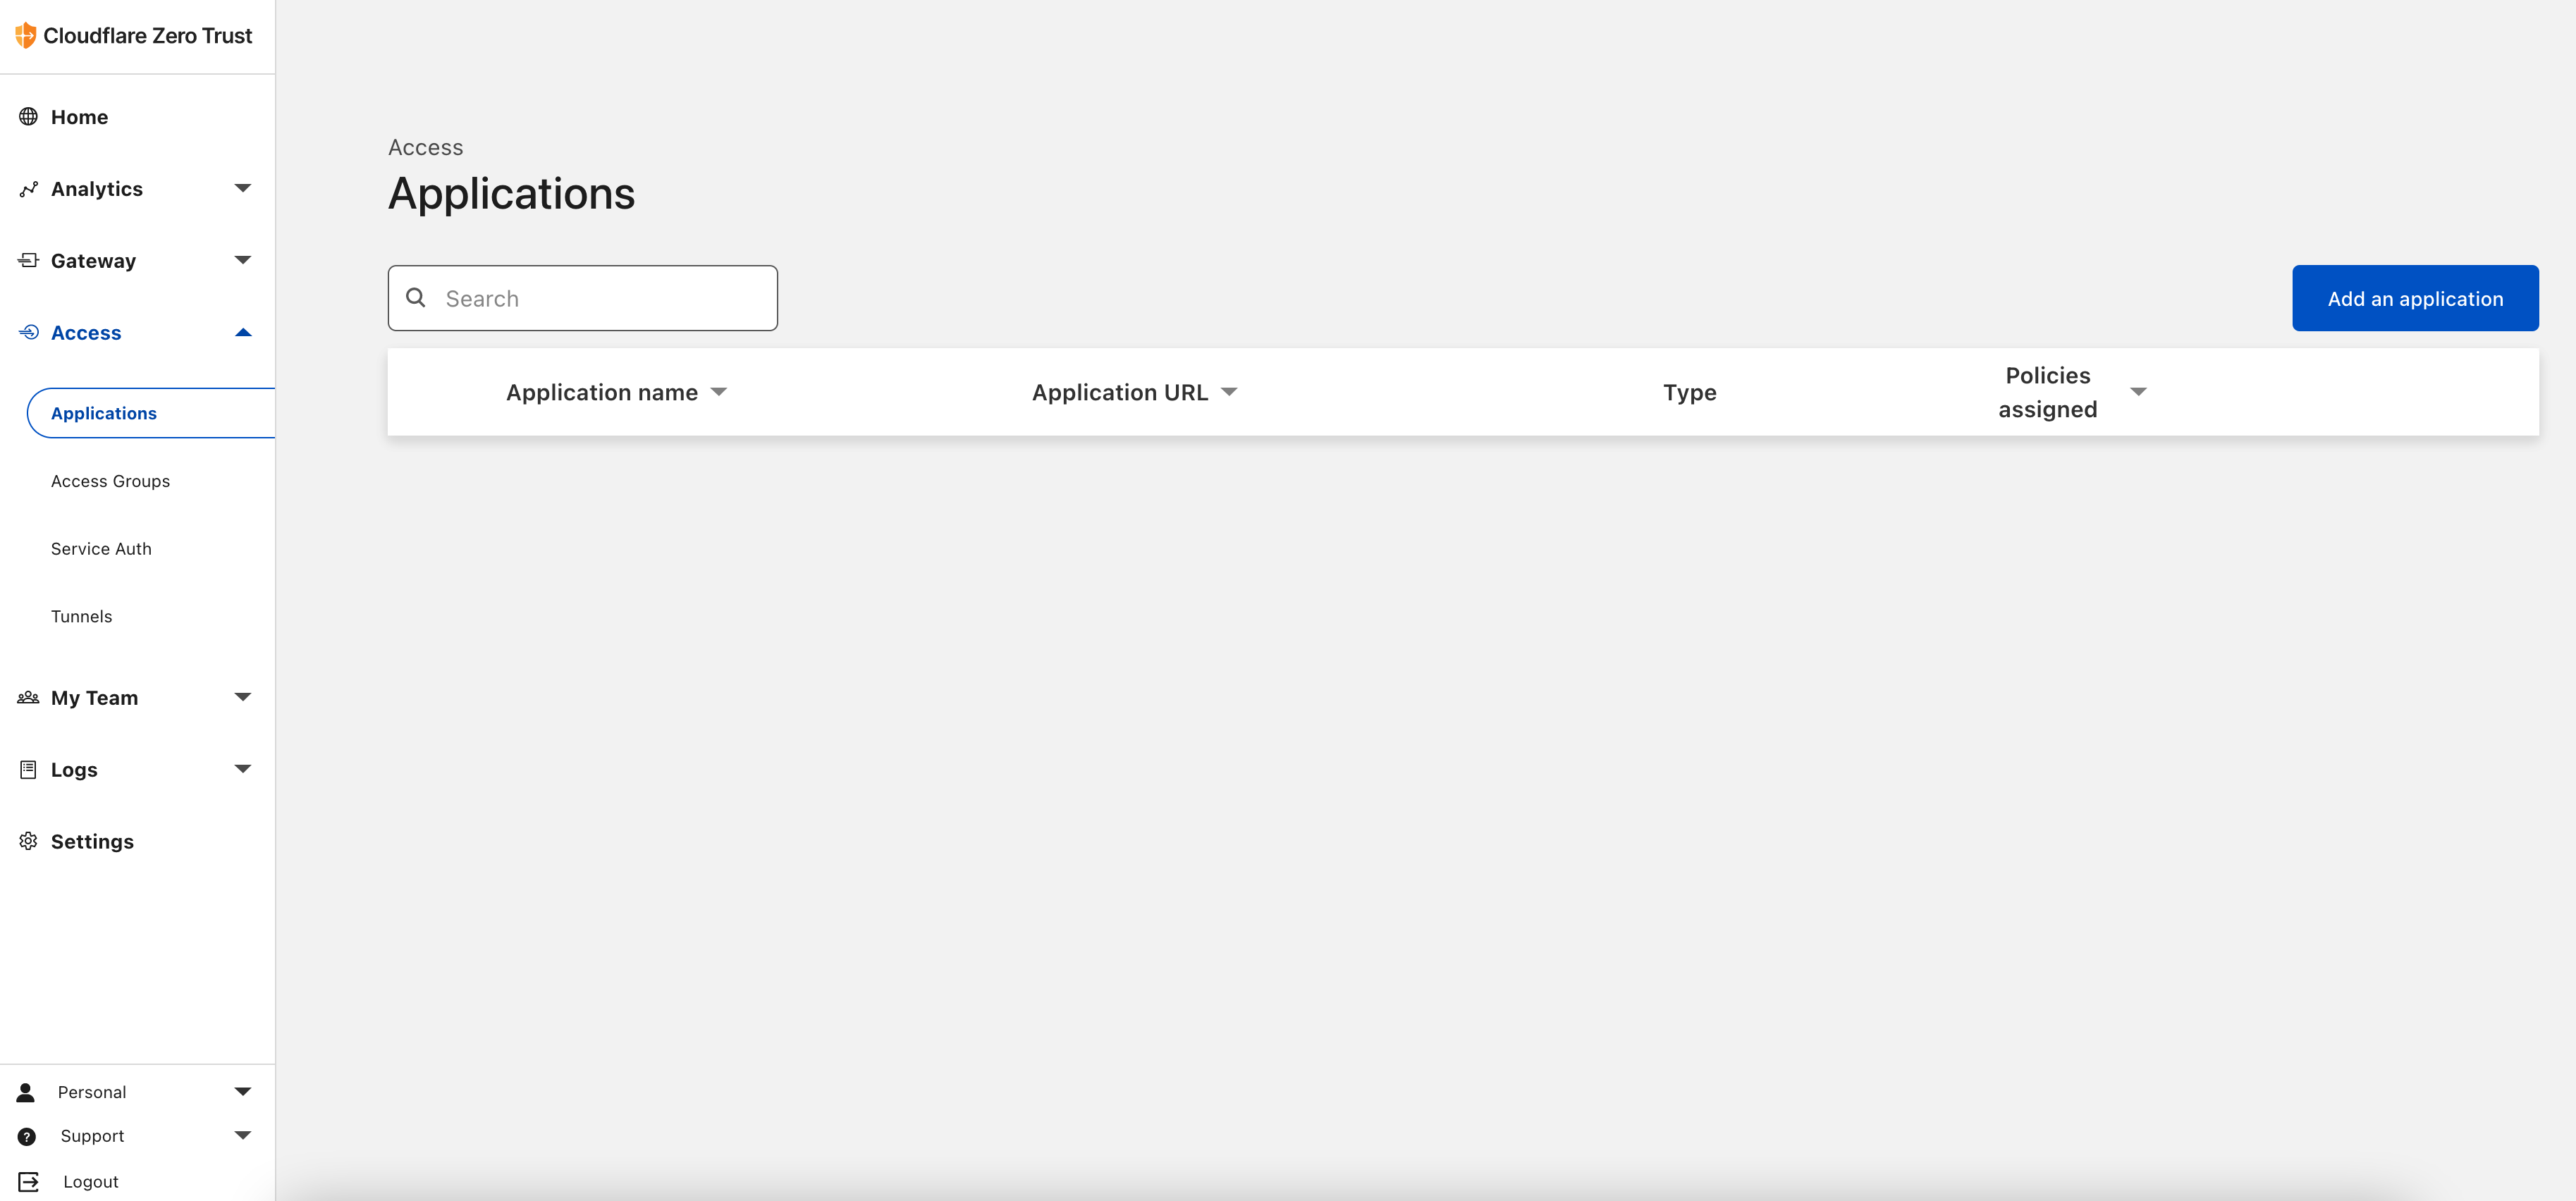
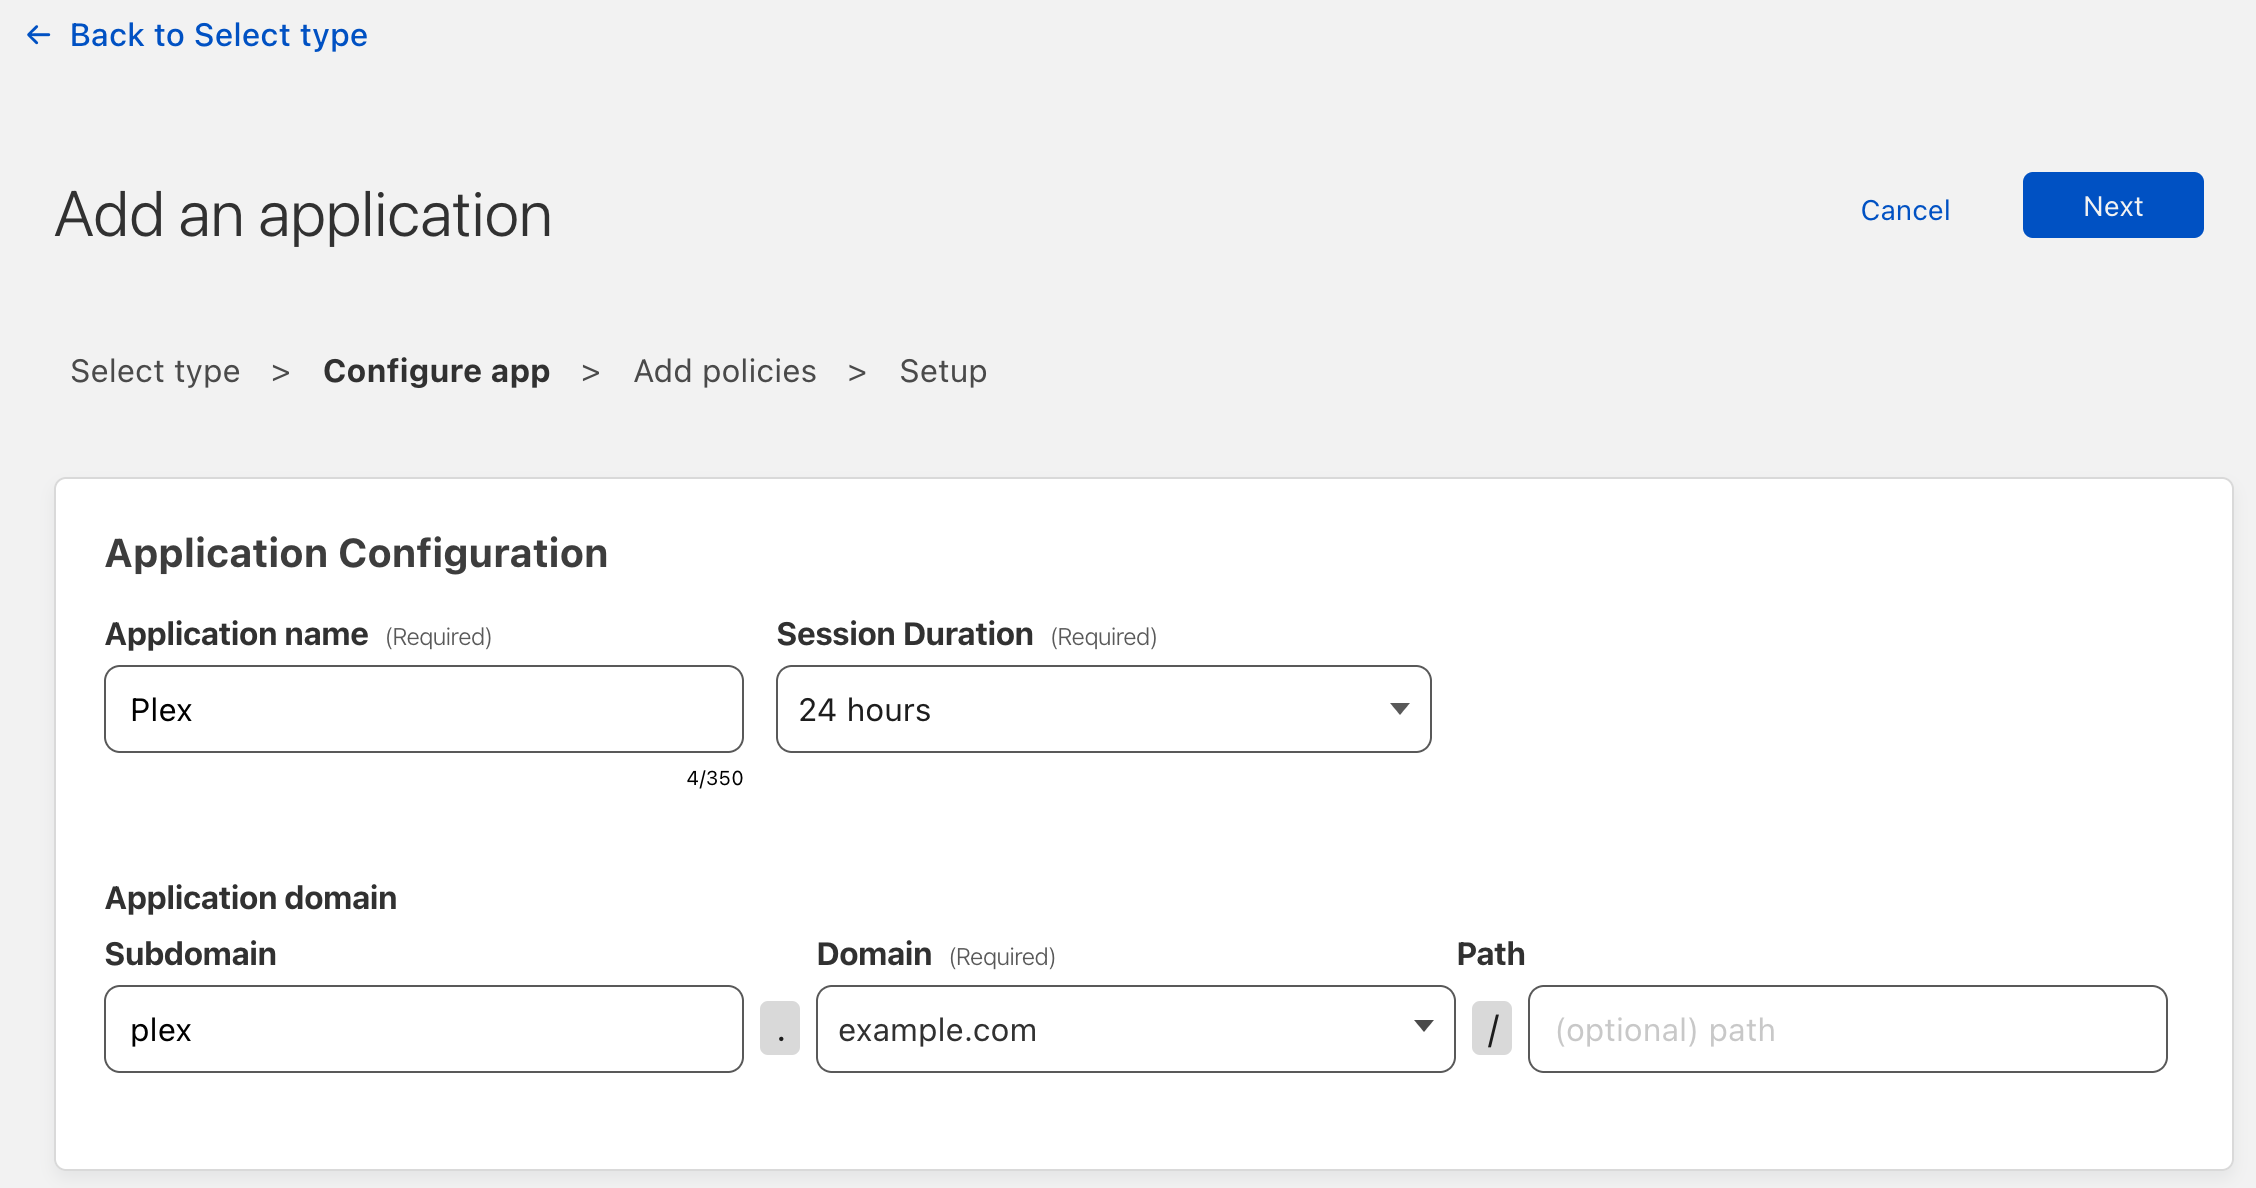
We are going to choose the “Self-hosted” option. Enter your specific details below and click “Next”.
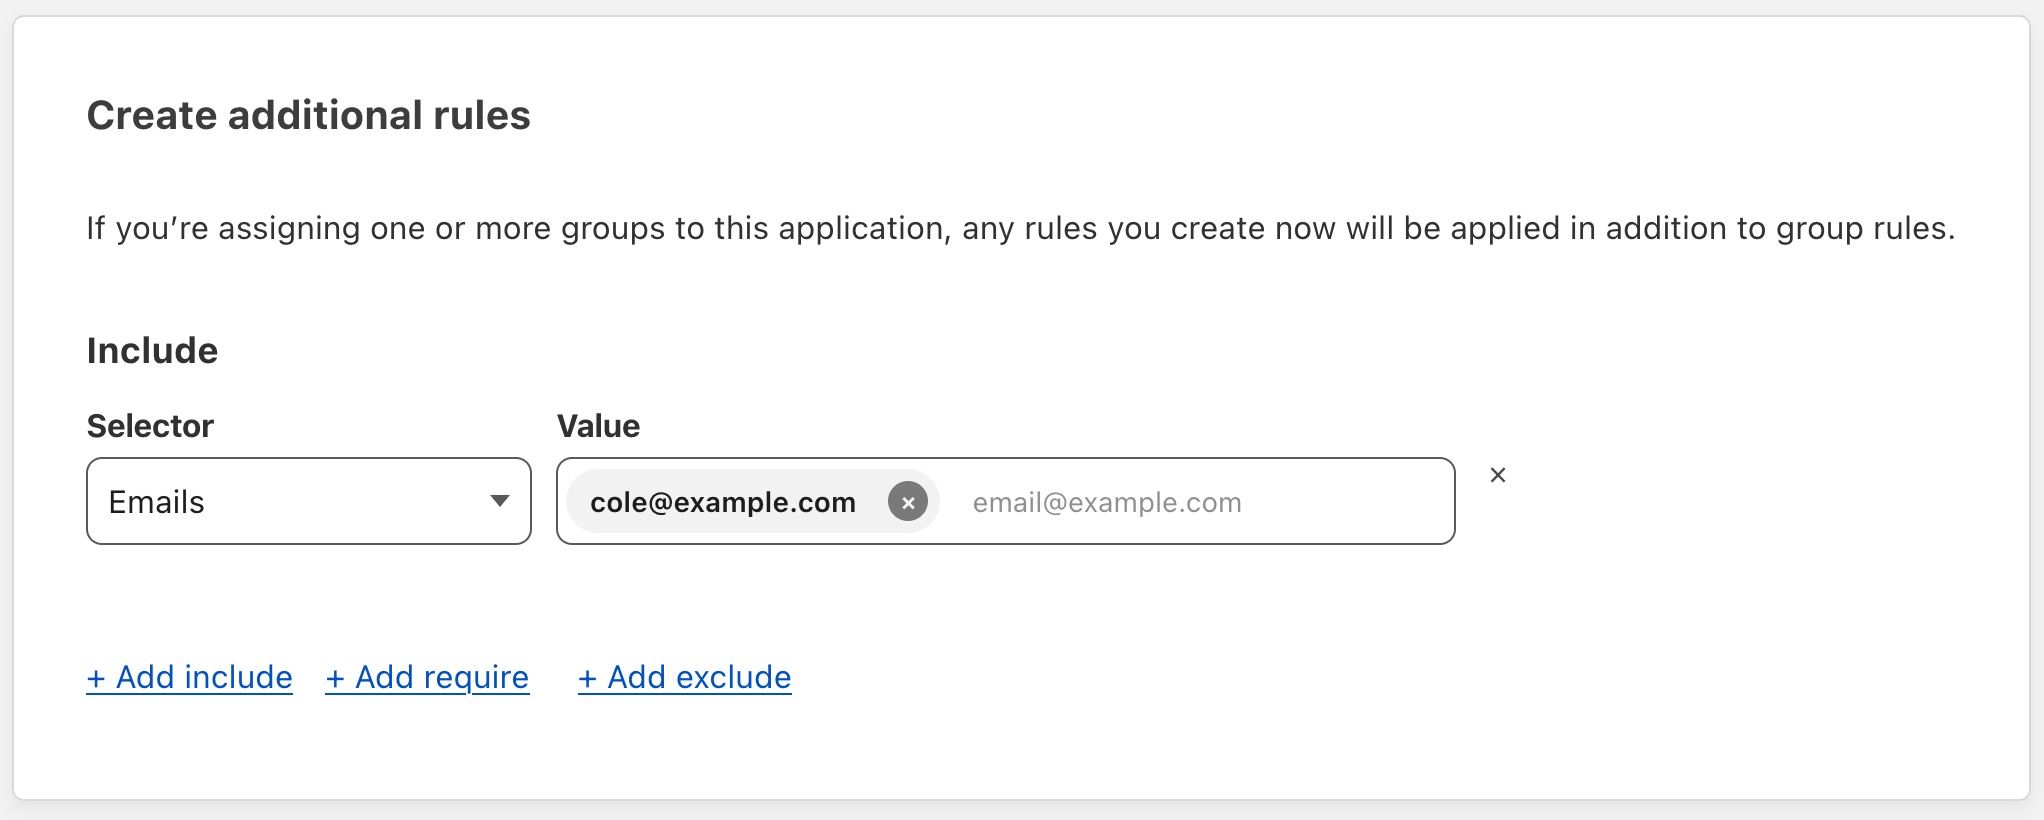
Enter a Policy name, keep “Allow” as the rule action then go ahead and scroll down to the “Create additional rules” section. Choose the “Email” option from the dropdown and enter your email on the right.
Choose “Next” again then go ahead and click “Add application”. After that the application should show up in your dashboard.
Finally, head on over to the route you configured for your tunnel https://plex.example.com and enter the same email
you entered when creating the application policy. You should then receive a code in your email. After entering that code
you will be taken directly to your Plex server!😌
Step 4: Relax and Enjoy 🍿
Grab some popcorn, your favorite beverage, and relax knowing your Plex server is secure. 😌
Summary
Using Cloudflare Tunnels with Cloudflare Access is an incredible combination to keep your entire stack secure, not just Plex. I personally use this to gate access to PostgreSQL, ClickHouse, SSH and even my Unifi network controller. You can go even further and define access policies that can be reused across several Cloudflare Access Applications.
Be sure to visit Cloudflare Access on the Developer Docs for the most up-to-date examples and information.